Table of Contents
myPass - Entering a Document Order Item Address
The purpose of this overview is to describe the look-and-feel and behavior of data entry fields used on myPass to allow users to enter/modify recipient address information for a Document Order Item Currently, users can create and/or modify the following types of Document Orders:
- Transcript
- Credential
Since recipient address formats should be the same on all Document Order Items regardless of the Document Category, a consistent set of user interface rules are used in Transcript and Credential Order related management screens view and manipulate recipient addresses.
Security
Data fields on Document Order management screens are secured based on whether user has the proper PASIprep permissions. See myPass Document Order Security Modes for more information on different security modes.
Viewing Recipient Address
Recipient address on a Document Order Item is printed on the document generated for the Order Item using the Address format documented in the PASI Data Format Guidelines. To provide user with the accurate representation on how the address is printed, myPass uses the same address format when displaying address for a Document Order Item on screen.
The address is styled in a fixed-width font to distinguish its special formatting from other data values.
Viewing of recipient addresses is available on the following screens/components:
- Address Preview Panel used in all screens related to creating and editing (new/edit/re-order/reprint) Transcript or Credential Document Order Items.
- View Document Order History screen
Entering Recipient Addresses
Users are required to enter a recipient address that will conform to the PASI Data Format Guidelines. The input fields are structured in a manner that will aid user in entering the address in the expected format.
Address Input Fields
The following data entry fields are used for entering recipient address Document Order Items.
- Visibility of a field depends the country the user is sending the document order item to; this is determined by what user selects for the “Deliver to Country” field, which is always presented as the first field when entering recipient addresses.
- When creating a new Document Order Item, all address input fields will be blank by default
- When modifying a Document Order Item that already has data saved to it, the input fields will load with the existing data values.
Please refer to Input Field Layout Examples for example screenshots of how the fields are laid out based on visibility of the fields.
| Field Name | Visible for Country | Description | ||
|---|---|---|---|---|
| Canada | USA | Others | ||
| Deliver to Country | Y | Y | Y |
|
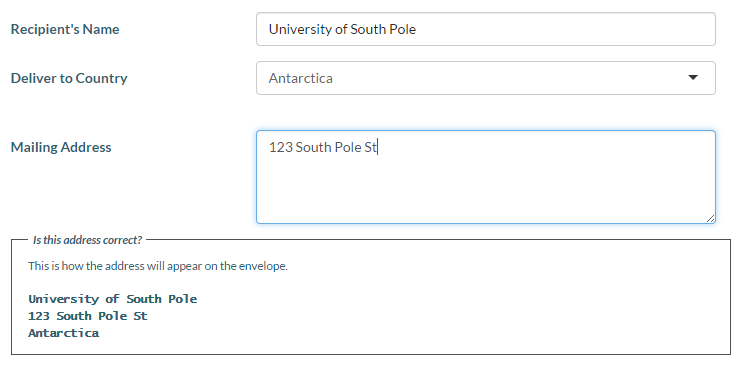
| Mailing Address | N | N | Y |
|
| Street Address | Y | Y | N |
|
| City | Y | Y | N | This is the Recipient City field on the Document Order Item |
| Province | Y | N | N |
|
| State | N | Y | Y |
|
| Postal Code | Y | N | N |
|
| ZIP Code | N | Y | N |
|
Address Preview Panel
Once user enters all the visible address fields for a Document Order Item, an Address Preview Panel will appear below the address-related fields. This panel shows how the Address will appear on the mailing envelope, so user can confirm if it appears proper to their knowledge and make correction as needed.
Address is formatted based on the rules defined in the PASI Data Format Guidelines.
Field Validation Rules
Before an address is saved to a Document Order Item the following should be validated:
- All address fields that are visible are mandatory and must be entered
- E.g. when entering a Canadian address, Street Address, City, Province, Postal Code and Deliver to Country are visible on screen and thus they cannot be empty.
- Canadian Postal Codes must be in the “XXX XXX” format
- USA ZIP Codes must be in the “XXXXX” or “XXXXX-XXXX” format
- Mailing Address and Street Address fields cannot have more than 246 characters
- Note that even if user enters less than 246 characters, when formatting the address, the address lines may still be trimmed or word wrapped to fit the prescribed mailing address format. User can always review the formatted address in the Address Preview Panel.
Input Field Layouts
Entering Canadian Address
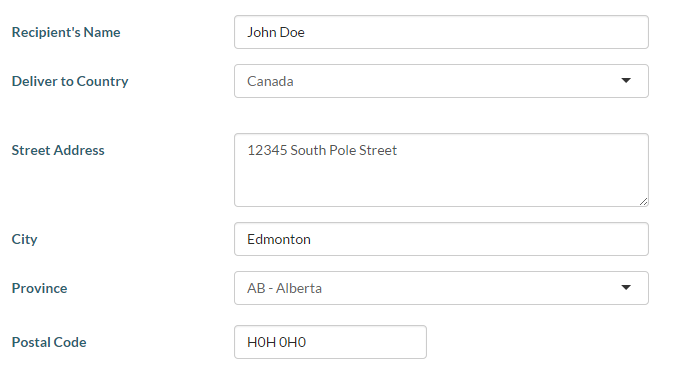
The following shows the address input fields that appears when “Canada” is the Recipient Country:
The following shows an example of how Canadian Address appears in the Address Preview Panel:
Entering US Address
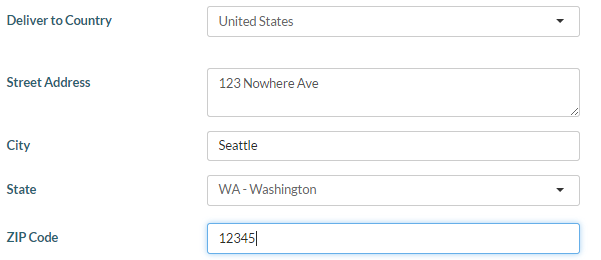
The following shows the address input fields that appears when “United States” is the Recipient Country” is selected as the country:
The following shows an example of how USA Address appears in the Address Preview Panel:


